Using EVA Foam for Costumes
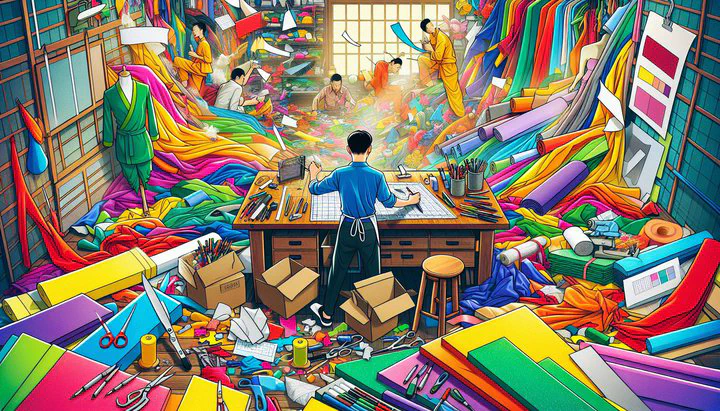
Introduction to EVA Foam for Costumes
Have you ever wondered how those amazing costumes at conventions and cosplay events are made? A lot of them use a material called EVA foam, and it’s a favorite among crafters for many reasons. EVA foam, which stands for ethylene-vinyl acetate, is a type of plastic that’s both flexible and durable. This makes it perfect for creating all sorts of costume pieces, from armor to props.
Using EVA foam for costumes is popular because it’s easy to work with, whether you’re a beginner or a seasoned pro. For those just starting out, EVA foam’s flexibility means you can cut, shape, and glue it with ease. You don’t need a lot of fancy tools or skills to get started, which is great if you’re new to crafting. Plus, it’s lightweight, so wearing your costume won’t be a heavy burden.
Experienced crafters love EVA foam because it’s incredibly versatile. You can paint it, heat-shape it, and even create intricate designs. It’s a blank canvas that can be transformed into just about anything your imagination can dream up. Whether you’re making a simple accessory or an elaborate full-body suit, EVA foam offers the potential to bring your ideas to life. So, if you’re excited to explore the world of costume-making, EVA foam is a fantastic place to start!
Choosing the Right Thickness of EVA Foam
When you’re ready to dive into using EVA foam for costumes, one of the first things you’ll need to decide is the thickness of the foam. This choice is super important because it affects how your costume will look and feel. So, what thickness of foam would you buy? Well, let’s explore!
EVA foam comes in various thicknesses, typically ranging from 2mm to 10mm or more. The thinner foams, like 2mm or 3mm, are great for detailed work or for creating flexible pieces like belts or small accessories. They’re easy to cut and layer, allowing you to create intricate designs. On the other hand, thicker foams, such as 6mm or 10mm, are perfect for building strong, sturdy parts like armor or large props. These thicker options provide more support and structure, making them ideal when you need something that holds its shape well.
If you’re working on a project like a chest plate or shoulder armor, you might choose a 6mm or 8mm foam. This thickness is strong enough to maintain shape but still easy enough to cut and mold. For smaller details or parts that need to bend, a 2mm or 3mm foam might be your best bet. By mixing different thicknesses in one project, you can achieve a balance of detail and durability.
It’s always a good idea to think about the type of costume you want to create. Consider what parts need to be sturdy and what should be more flexible. Understanding the purpose of each piece will help you decide which thickness is right for you. Remember, practice makes perfect, and experimenting with different foam sizes will help you get a feel for what works best. So, grab some foam and start crafting your masterpiece!
Stiffening EVA Foam: Is Mod Podge Enough?
When you’re working on a costume with EVA foam, you might wonder how to make it sturdy enough to hold its shape. One popular question is, “Is stiffening with Mod Podge enough?” Let’s explore the options!
Mod Podge is a versatile craft glue that many people use to seal and stiffen EVA foam. It’s easy to apply—just brush it on and let it dry. It creates a slightly stronger surface and smooths out the foam’s texture, making it ready for painting. However, while Mod Podge does provide some stiffness, it might not be enough if you’re looking for a lot of durability, especially for larger or more complex pieces.
For a stronger hold, you might want to consider other methods like heat sealing or using Plasti Dip. Heat sealing involves gently heating the foam with a heat gun, which closes the foam’s surface cells and gives it a firmer finish. This method is great for creating a smooth base before painting. Plasti Dip, on the other hand, is a rubber coating that you can spray on the foam. It gives a flexible but tough layer that can handle more wear and tear.
Each method has its pros and cons. Mod Podge is budget-friendly and easy to use, making it a good start for beginners. Heat sealing is quick and doesn’t add any extra weight to your costume. Plasti Dip provides excellent protection and a professional finish, but it can be more expensive and requires careful application.
Ultimately, the best choice depends on your project needs. If you’re making smaller pieces or props, Mod Podge might be just fine. For larger pieces or ones that need to withstand more movement, combining methods could be your best bet. Try experimenting with different techniques to see what works for you, and soon you’ll be a pro at stiffening EVA foam for costumes!
Beginner Tips for Working with EVA Foam
Are you ready to start using EVA foam for costumes but feeling a bit nervous? Don’t worry! If I’ve never worked with EVA foam before is a thought that’s crossed your mind, you’re definitely not alone. Let’s dive into some beginner-friendly tips to ensure your crafting journey is smooth and fun.
First things first, safety is key. EVA foam is easy to cut, but always use a sharp craft knife or scissors and work on a cutting mat to protect your surfaces. It’s a good idea to wear a mask when sanding or cutting foam to avoid breathing in any tiny particles. And remember, if you’re using a heat gun or glue gun, handle them with care to avoid burns.
Start small with your projects. This would be a good starter project: try making a simple mask or a small accessory like a bracelet or crown. These projects don’t require a lot of material or complicated techniques, so they’re perfect for getting comfortable with the foam. Plus, completing a small project can boost your confidence and encourage you to tackle more complex designs.
When you’re ready to assemble your pieces, contact cement is a popular choice for gluing EVA foam. It creates a strong bond that dries quickly. Just apply it to both surfaces, let it dry for a few minutes until tacky, and then press the pieces together. Practice this technique on scrap pieces of foam first to get the hang of it.
Lastly, don’t forget to have fun and experiment! Play around with different tools and techniques, like adding texture or painting your foam creations. Mistakes are part of learning, so don’t be discouraged if things don’t turn out perfect right away. The crafting community is full of supportive people who love to share tips and tricks, so don’t hesitate to reach out for advice or inspiration.
With these tips in mind, you’re all set to start your EVA foam adventure. Happy crafting!
Project Ideas: Starter Projects Using EVA Foam
Now that you’re ready to begin using EVA foam for costumes, let’s explore some fun and easy starter projects! These ideas are perfect if I’ve never worked with EVA foam before is your current status. They’re simple enough for beginners but still offer a chance to be creative and learn new skills.
1. Foam Crown or Tiara: Creating a crown or tiara is a fantastic way to start. You can design it as simple or as elaborate as you like. Use 2mm or 3mm EVA foam for flexibility and comfort. Trace your design onto the foam, cut it out, and decorate it with paint, gems, or glitter. This would be a good starter project because it introduces basic cutting and decorating techniques without being too overwhelming.
2. Simple Cosplay Mask: Masks are another excellent project for beginners. They allow you to practice shaping and detailing with EVA foam. Start with a basic mask template, cut it out of 2mm or 3mm foam, and use heat to shape it to fit your face. You can paint it to match your costume or add embellishments for extra flair. This project helps you get comfortable with using tools like heat guns and paints.
3. Foam Armor Bracers: If you’re eager to try something more adventurous, making bracers is a great next step. Use 6mm foam for sturdiness and durability. Cut out the shape of the bracers, heat them slightly to mold them around your arms, and then add fun details with paint or craft foam. This project teaches you about layering and shaping, key skills for more complex costumes.
Each of these projects offers a chance to practice and improve your EVA foam skills. As you gain confidence, you can explore more advanced techniques and even start combining different projects into a complete costume. For detailed tutorials and step-by-step guides, be sure to check out other resources on Crafting Inspirations.
Remember, practice makes perfect, and the most important thing is to enjoy the process. Happy crafting!
Conclusion: Start Crafting with Confidence
Now that you know the basics of using EVA foam for costumes, you’re ready to start creating your own amazing designs! Remember, every expert was once a beginner, and with each project, you’ll get better and more confident. Whether you’re wondering, “What thickness of foam would you buy?” or thinking, “Is stiffening with Mod Podge enough?”, don’t hesitate to experiment and find what works best for you.
Crafting is all about creativity, fun, and learning, so enjoy the journey. Check out other tutorials on Crafting Inspirations for more tips and project ideas. Happy crafting, and may your costumes dazzle and inspire!