How to Shape Leather Around a Rectangle Box
How to Shape Leather Around a Rectangle Box
Introduction to Leatherworking Basics
Want to shape leather around a rectangle box so it fits like a glove? Good prep makes the job easy and stops loose corners later.
- Choose the right leather. Vegetable-tanned, 5–6 oz thickness, bends well and dries stiff.
- Measure your simple rectangle wooden box with sharp edges/corners. Write down length, width, and height. Add a ¼-inch seam allowance all around.
- Lightly mist both sides of the leather until it feels cool. This “casing” step lets you make the leather fit more tightly later.
- Wrap the wooden box in plastic wrap to keep water off the wood.
Tools and Supplies
• Sharp craft knife
• Metal ruler
• Edge beveler
• Stitching chisel or punch
• Needles and waxed thread
• Leather glue or double-sided tape
• Small mallet
• Rubber bands or painter’s tape
• Clean spray bottle with water
Keep everything close. Damp leather dries fast.
Step-by-Step Guide to Creating the Leather Case
1. Cut the Leather
Cut one long strip that will wrap all the way around the box plus your ¼-inch seam. If you want a lid, cut two end pieces.
2. Mark the Fold Lines
Place the strip rough side up. Set the box on top. Lightly trace lines at each edge. These guides show where to bend as you shape leather around a rectangle box and “make a leather “case” for it to protect it.”
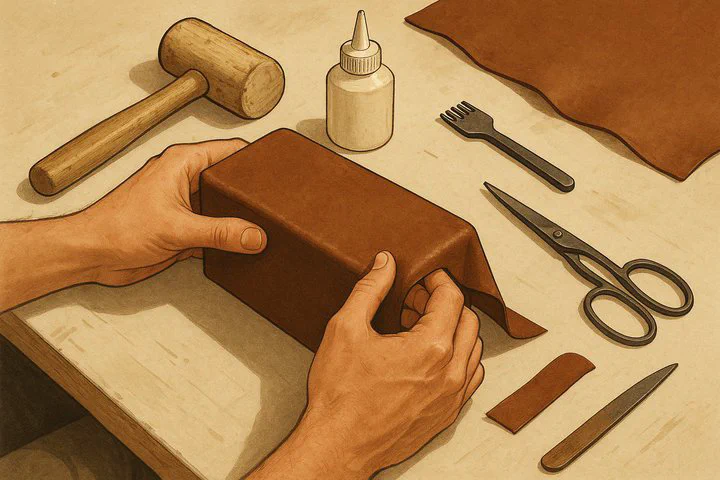
3. Wet and Wrap
Mist the leather again. Lay it around the simple rectangle wooden box with sharp edges/corners. Use rubber bands or tape to get the leather to stay tight around it. Press the corners with your thumbs or a smooth spoon. Slow pressure here will make the leather fit more tightly once dry.
4. Glue and Stitch
After 10–15 minutes the leather will keep its new shape.
- Open one side.
- Brush a thin layer of leather glue on the seam.
- Press shut and let it set for a few minutes.
- Punch evenly spaced holes through both layers.
- Saddle-stitch with waxed thread, pulling each stitch firm to keep shaping.
5. Dry and Adjust
Leave the case on the box overnight. When dry, slide it off. If a spot feels loose, dampen just that area and pinch it tight—another quick way to shape leather around a rectangle box perfectly.
Finishing Touches and Tips
Your case is dry and strong. Time to polish it up!
- Bevel the edges to round them off.
- Burnish the edges with a damp cloth, then a wood slicker for a smooth shine.
- Add color if you like. Wipe on thin coats of leather dye with a sponge. Let each coat dry.
- Seal with a clear finish or beeswax polish for water resistance.
- Decorate: stamp a pattern, sew on a snap, or glue a felt lining inside.
Quick Tip: Test any dye or stamp on scrap leather first. It saves headaches later.
Care
• Wipe dust off with a dry cloth after each use.
• Rub in leather conditioner every few months.
• Store in a cool, dry place away from direct sun.
Wrap-Up
You learned how to shape leather around a rectangle box, glue and stitch the seam, and add pro-level finishes. Take a moment to admire your new case—you built it to last! Got extra ideas or photos of your work? Share them with us in the comments or tag @CraftingInspirations on social media. Happy crafting!