Seam Allowance for Cosplay Shorts
Seam Allowance for Cosplay Shorts
Are you ready to create your own amazing pair of cosplay shorts? Whether you’re a beginner or a seasoned crafter, understanding seam allowance is key to ensuring a perfect fit and durable finish. In this article, you’ll learn everything you need to know about seam allowance for cosplay shorts, from choosing the right fabric to adding those special finishing touches. Let’s dive into this exciting crafting journey together!
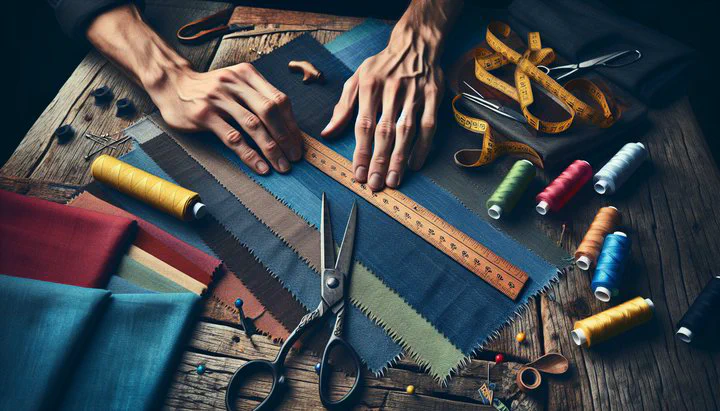
Understanding Seam Allowance
Have you ever wondered what seam allowance is and why it’s important, especially when making cosplay shorts? Seam allowance might sound a bit fancy, but it’s really just the extra fabric you leave between the edge of your fabric and the line where you sew. This little bit of extra fabric is super important because it helps keep your seams strong and your shorts looking great.
When you’re making cosplay shorts, knowing about seam allowance is crucial. Why? Because it allows your shorts to fit well and holds everything together, even when you’re moving around a lot. Seam allowance gives you room to work and helps prevent the fabric from fraying or your stitches from coming undone. So, when you ask yourself, “How much seam allowance should I have?” the answer depends on the fabric and the design, but a common choice is about 1/2 inch. This is a good rule of thumb for most projects and makes sewing your shorts easier.
Beginners, don’t worry! Understanding seam allowance is simpler than it seems. Just remember, it’s like giving yourself a little safety zone when sewing. This safety zone gives you space to adjust if things don’t line up perfectly the first time. Plus, having the right seam allowance helps your cosplay shorts look professional and last longer. So, as you dive into your next crafting adventure, keep seam allowance in mind. It’s a small detail that makes a big difference!
Choosing the Right Fabric
When it comes to making your cosplay shorts, choosing the right fabric is just as important as knowing about seam allowance for cosplay shorts. One popular choice is a thin purple polyester with a little bit of stretch. This type of fabric is lightweight, has a nice drape, and the bit of stretch helps your shorts fit comfortably. But how does this affect your seam allowance?
Different fabrics need different seam allowances. For stretchy fabrics like our purple polyester, you might need to adjust your seam allowance a bit. The stretchiness means your shorts will move with you, which is great for comfort, but it also means the seams need to be stronger. Consider using a seam allowance that’s slightly wider, like 5/8 inch, to give yourself extra space for hemming the edges and making those seams stronger.
Working with stretchy fabrics can be a bit tricky at first, but don’t worry! Here are some tips. First, make sure you use the right needle and thread. A ballpoint needle is gentle on stretchy fabrics and helps prevent snags. Second, consider using a zigzag stitch. This type of stitch stretches with the fabric, keeping your seams from popping open. Lastly, practice on scrap fabric before you start on your shorts. This way, you can get a feel for how the fabric behaves and adjust your seam allowance accordingly.
Remember, crafting is all about experimenting and finding what works best for you. So, embrace the challenge of working with different fabrics and enjoy the process. With a bit of patience and practice, you’ll be a pro at handling stretchy fabrics in no time!
Making Your Cosplay Shorts Pattern
Creating your own pattern for cosplay shorts is an exciting step in the crafting journey. Plus, when you make your own pattern, you can ensure it fits just right and looks exactly how you want. Let’s dive into how you can make a pattern, while also considering the all-important seam allowance for cosplay shorts.
To start, you’ll need to take some measurements. Measure around your waist, hips, and the length you want your shorts to be. Once you have these measurements, you can begin making the pattern out of that. On a large piece of paper, draw out the shape of one leg of the shorts based on your measurements. Remember, you’ll need two pieces for each leg—one for the front and one for the back.
Now here’s where the magic happens: adding the seam allowance for cosplay shorts. Once you have your basic pattern drawn, add about 1/2 inch around all the edges for your seam allowance. This extra fabric is crucial for making sure your shorts fit well and stay together. Don’t forget to include extra space for hemming the edges, which is usually around 1/2 inch to 1 inch, depending on how much you want to fold over.
As you cut your fabric, make sure to follow the pattern and the seam allowance markings carefully. This ensures that when you sew everything together, your seams will be in the right places. It’s like a puzzle coming together! If you’re using that thin purple polyester with a little bit of stretch, remember to handle the fabric gently and check that your pattern pieces are the right size before you start cutting.
Finally, remember that practice makes perfect. Don’t be afraid to make adjustments to your pattern if you find that something doesn’t fit quite right. Each time you create a new pair of cosplay shorts, you’ll get better and more confident in your pattern-making skills. So grab your fabric, your paper, and your enthusiasm, and start crafting your perfect pair of cosplay shorts!
Sewing Tips and Tricks
Now that you’ve got your pattern ready and your fabric cut, let’s move on to the fun part—sewing your cosplay shorts! Here are some handy tips and tricks to help you along the way and make sure your shorts look super professional.
First up, when sewing your seam allowance for cosplay shorts, make sure you’re using the right stitch. For stretchy fabrics like our thin purple polyester, a zigzag stitch is your best friend. This stitch allows the seams to stretch with the fabric, so they don’t break when you move around. If your sewing machine has a stretch stitch option, even better! It’s perfect for keeping those seams nice and strong.
Next, let’s talk about achieving clean seams and edges. One trick is to press your seams open with an iron as you go. This helps everything lie flat and look neat. If your fabric frays easily, consider finishing the raw edges with a serger or an overlock stitch. This will keep your shorts looking tidy and prevent any loose threads from popping out.
Sometimes, sewing can be a bit tricky, and things might not go perfectly on the first try. If you find your fabric puckering or your seams not lining up, don’t panic! Check your tension settings on the sewing machine and make sure you’re not pulling the fabric too tightly as you sew. Remember, it’s okay to take things slow and make adjustments as needed.
Finally, let’s sprinkle in some encouragement. Sewing can be challenging, especially with new fabrics or techniques, but every project is a chance to learn and improve. Celebrate each small victory, like a perfectly sewn seam or a neatly hemmed edge. With every stitch, you’re getting better and more skilled. So keep going, and before you know it, you’ll have a fabulous pair of cosplay shorts that you made all by yourself!
Now that you have your shorts sewn up, it’s time for the final touches. Let’s get creative and make your shorts truly unique!
Final Touches and Inspiration
Congratulations! You’ve sewn your cosplay shorts, and they’re looking great. Now it’s time to add those final touches that will make them uniquely yours. This is where you can really let your creativity shine and bring your vision to life.
One way to personalize your shorts is by adding unique designs or details. Consider sewing on patches, using fabric paint, or adding decorative trims. You could sew on some buttons or embroidery to give your shorts a special flair. Remember, there are no limits when it comes to creativity, so don’t be afraid to try something new.
Need some inspiration? Look at examples of completed cosplay shorts online or in crafting communities. You’ll find lots of creative ideas that might spark your own imagination. Whether it’s a bold pattern, a touch of sparkle, or a character theme, these examples can show you what’s possible and help you decide on the perfect finishing touches for your shorts.
Finally, once you’ve added your personal touches, it’s time to share your creation with the world. Consider posting your finished cosplay shorts in online forums or social media where fellow crafters gather. Sites like Instagram, Pinterest, or crafting subreddits are great places to showcase your work and get feedback. Sharing your projects can also inspire others who are working on their own creations.
As you finish your cosplay shorts, remember that crafting is all about joy and exploration. Each project you complete not only improves your skills but also leaves you with a unique piece that you created. So celebrate your hard work, and know that with each stitch, you’re part of a vibrant community of creators. Keep crafting, keep experimenting, and most importantly, have fun!
Call to Action
Now that you’ve mastered the art of creating cosplay shorts, why not share your creations and learn from others? Visit our Crafting Inspirations community subreddits where you can connect with fellow enthusiasts, share your projects, and find even more resources to fuel your creativity.
Remember, every expert was once a beginner. Don’t be afraid to experiment; crafting is about learning and having fun. Happy sewing!