Choosing Needles for Knitting Patterns
Choosing Needles for Knitting Patterns
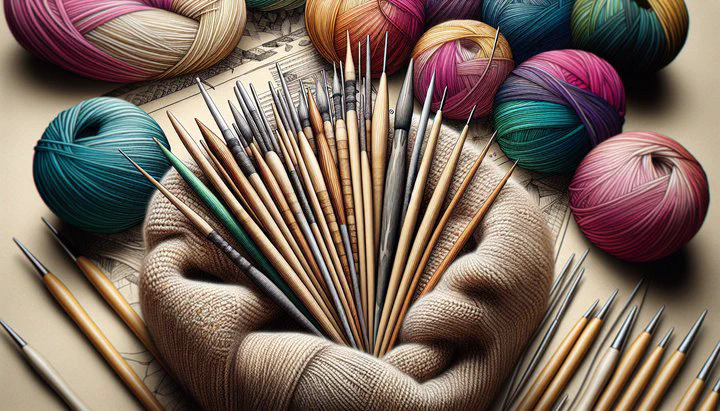
When you start a knitting project, choosing needles for knitting patterns is a crucial step that can make a big difference in your crafting experience. Picking the right needles helps your projects come out just right, whether you’re making a cozy scarf or a detailed sweater. Let’s dive into the different types of needles and how to use them!
Understanding Needle Types
When you’re diving into the world of knitting, choosing needles for knitting patterns can seem a bit overwhelming. But don’t worry! Let’s break down the basic types of knitting needles you’ll encounter: straight, circular, and double-pointed.
Straight needles are the classic choice. These are long, straight rods with a point on one end and a stopper on the other. They’re great for flat pieces like scarves or dishcloths. If you’re a beginner, straight needles are often the easiest to start with because they’re straightforward (pun intended!).
Circular needles are a game-changer when it comes to versatility. They consist of two needle tips connected by a flexible cord. Circular needles are perfect for projects like hats, cowls, or even blankets. They’re especially useful for working on projects “back and forth” without needing to worry about losing your stitches. For example, 3.5 mm / US4 circular and 2 double-pointed needles are excellent choices for smaller, more detailed work or when you need to knit in the round.
Lastly, we have double-pointed needles (DPNs). These are short needles with points on both ends and are used for knitting in the round on smaller items like socks or mittens. While they might look a bit tricky at first, they allow you to create seamless tubes, which is perfect for these types of projects.
Each type of needle has its unique benefits and purposes. Whether you’re knitting a cozy sweater or a pair of socks, knowing which needle to use can make a big difference in your crafting journey. So, next time you’re choosing needles for knitting patterns, remember the strengths of each type and pick the one that best suits your project!
Techniques: Working Back and Forth
When you’re knitting, you might come across the term “worked back and forth.” This technique is just like it sounds—knitting across the row and then turning the work to knit back in the opposite direction. It’s a common method for creating flat pieces like scarves, blankets, or panels for a sweater.
You might think that circular needles are only for knitting in the round, but they can be a fantastic tool for working back and forth as well. The flexible cord on circular needles helps distribute the weight of the project, making it easier on your wrists and hands. This is especially helpful if you’re working on a large piece, like a blanket. So, don’t hesitate to grab those 3.5 mm / US4 circular and 2 double-pointed needles when your pattern calls for it!
Using circular needles for flat projects also means you don’t have to worry about losing stitches off the ends, which can sometimes happen with straight needles. Plus, if you’re traveling or knitting on the go, circular needles are more compact and easier to manage. They can be tucked away neatly in a bag without any pokey ends sticking out.
While circular needles are often the go-to for working back and forth, there are times when double-pointed needles might be the better choice. If you’re knitting a small piece or need to switch to knitting in the round partway through a project, like when shaping sleeves or a hat’s crown, DPNs can be very handy. They allow for seamless transitions between flat and round knitting.
Overall, understanding how and when to use each type of needle for working back and forth is key to improving your knitting skills. The more you experiment, the easier it will become to decide which needles to pick up next time you’re choosing needles for knitting patterns!
Choosing the Right Cord Length
When working with circular needles, one important question you might have is how long the cord should be. This is a crucial factor that can affect the ease and comfort of your knitting experience. Let’s explore how to choose the right cord length for your projects.
The length of the cord on your circular needles should match the size of your project. If you’re knitting a hat, a shorter cord, like 16 inches, is usually ideal. For larger projects, like sweaters or blankets, you might need a longer cord, such as 32 inches or more. Having the right cord length ensures that your stitches move smoothly along the needles without being too cramped or too stretched.
Another thing to consider is the type of yarn you’re using. Thicker yarns might require a longer cord to accommodate the bulk of the stitches. Similarly, if you’re knitting with 2 strands held together, you’ll want to make sure the cord isn’t too short, which could make handling the extra yarn cumbersome and lead to uneven tension.
Adjusting the cord length can also enhance comfort. If you find your hands getting tired or your stitches feeling too tight, try switching to a longer cord. Many circular needles come with interchangeable cords, allowing you to swap out lengths as needed. This can be a great investment if you frequently switch between project sizes.
Ultimately, understanding how long the cord should be is all about ensuring your knitting is as enjoyable and efficient as possible. By choosing the right cord length, you’re setting yourself up for a smoother knitting experience. So next time you’re choosing needles for knitting patterns, take a moment to consider your cord length options and pick the one that best suits your project needs!
Knitting with Two Strands Together
Have you ever tried knitting with 2 strands held together? This technique can open up a whole new world of possibilities for your knitting projects. Let’s dive into why you might choose to knit with two strands and how it can impact your needle choice and the texture of your finished piece.
Knitting with 2 strands held together is a fun way to play with color and texture. By holding two different yarns together, you can create a marled effect, blending colors in unique ways. This technique can also add bulk to your project, which is perfect when you want to knit something warm and cozy, like a chunky scarf or a thick blanket.
When you’re knitting with two strands, it’s important to think about your needles. You might need to go up a needle size to accommodate the extra thickness. For example, if your pattern calls for 3.5 mm / US4 circular and 2 double-pointed needles, you might want to go up to a 4.5 mm / US7 to ensure your stitches aren’t too tight. This adjustment can help maintain an even tension and make your knitting more comfortable.
Managing two strands can be a bit tricky at first, but with a few tips, you’ll be knitting smoothly in no time. Make sure to keep both strands together and untangled as you work. You can use separate yarn balls or cakes for each strand to prevent tangling. Maintaining even tension is key, so check your work frequently to ensure both strands are knitting up consistently.
The texture of your fabric will also change when you knit with two strands. It will be thicker and denser, adding warmth and structure to your project. This is ideal for projects like sweaters or hats that need a bit of extra heft. By experimenting with different yarn combinations, you can discover new textures and effects, enhancing your creative possibilities.
Knitting with 2 strands held together offers endless opportunities for creativity and customization. Whether you’re adding color, texture, or warmth, this technique can help you achieve the look and feel you want for your projects. Next time you’re choosing needles for knitting patterns, consider giving this fun technique a try to add something special to your knitting adventures!
Conclusion
Choosing the right needles for your knitting patterns is like picking the perfect tool for the job. By understanding the different types of needles and how they work with your projects, you can make your knitting experience smoother and more enjoyable. So, grab your needles, experiment with new techniques, and let your creativity shine through every stitch!