Blueprint Design Help for Cosplay
What Are Blueprint Designs and Why Do They Matter in Cosplay?
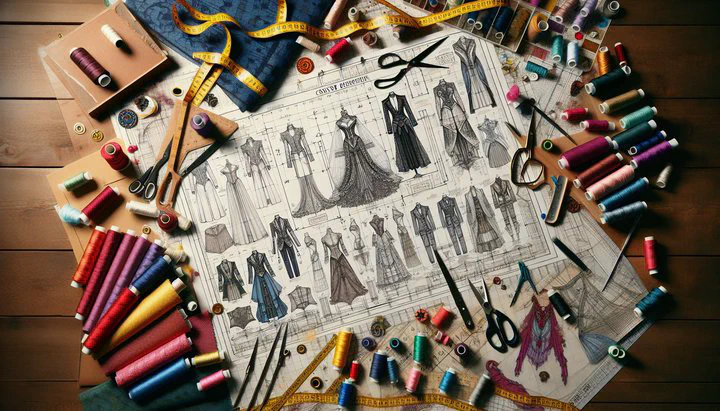
Are you ready to bring your favorite character to life with an amazing cosplay? Let’s dive into blueprint design help for cosplay! In the world of cosplay, a blueprint is your guiding star. Think of it as a treasure map that shows you all the steps needed to create your costume. With a blueprint of a design, you can see the big picture and all the little details too.
Using a blueprint in your cosplay design makes a big difference. It gives you a clear plan from the start, showing exactly what pieces you need and how they fit together. This not only saves time but also keeps you organized, especially with complex costumes. Instead of feeling lost in a sea of materials, you’ll have a clear path to follow.
Blueprints are great for visualizing the final product. By sketching out your design, you can see how your costume will look before cutting fabric. This way, you can make changes or improvements early on. Remember, a good blueprint is like having a reliable friend by your side, guiding you every step of the way!
How to Translate Images to Real-Life Dimensions
Once you’ve got your blueprint design ready, it’s time to translate images to real-life dimensions. This step is crucial in turning your reference image into a wearable masterpiece. Don’t worry—it’s easier than it sounds, and we’re here to help!
Start by carefully looking at your reference image. Notice every detail, like the size of the armor pieces or the length of the cape. To get the right proportions, you’ll need to scale the image to fit your body. A handy way to do this is by using the grid method. Draw a grid over your reference image and a matching grid on your blueprint. This helps you see how each part of the image can be expanded to real-life size.
For those who love tech tools, software like Adobe Illustrator or free options like GIMP can be a big help. These programs let you resize and adjust your images accurately. But if you’re more of a hands-on person, a simple ruler and calculator can work wonders, too! Just remember to keep checking your measurements so everything fits perfectly.
Cosplay design help often includes tips on choosing the right tools, and a measuring tape is your best friend here. Measure twice, cut once—that’s the golden rule! And don’t forget to consider your comfort. Make sure the dimensions allow you to move freely while still looking true to your character.
By carefully translating your image to real-life dimensions, you are setting the foundation for a fantastic cosplay costume. This step might take some time, but patience pays off. Soon enough, you’ll have a blueprint that matches your vision, ready to guide you through the crafting process. Keep going—you’re doing great!
What Materials Should You Choose for Your Cosplay?
Now that you have your blueprint of a design ready and have worked on translating images to real-life dimensions, it’s time to choose the materials that will bring your cosplay to life! Picking the right materials is like choosing the perfect ingredients for a recipe—it can make all the difference in how your final costume looks and feels.
Start by thinking about the suggest materials for cosplay that match your blueprint. If your character wears armor, you might want to use materials like EVA foam or thermoplastics. These are lightweight yet sturdy, making them great for crafting detailed pieces. For costumes with lots of fabric, consider different types of textiles. Cotton is comfortable and easy to work with, while satin or velvet can add a touch of luxury and shine to your outfit.
It’s important to consider the balance between looks and comfort. Will you be wearing this costume for a long time? Then breathable fabrics might be the best choice. Also, think about the durability of your materials, especially if you plan on using your costume multiple times. Some materials may look amazing but might not hold up well after a few uses, so plan accordingly.
When sourcing materials, check local craft stores or online shops that specialize in cosplay supplies. Sometimes, you can even find hidden gems at thrift stores, where you can repurpose old clothing or accessories into something new and exciting. Be creative and keep an open mind—you never know what might spark an idea!
Finally, always test your materials before you dive into building your costume. Make small samples to see how they behave when cut, glued, or sewn. This can save you from any surprises later on and help ensure a smoother crafting process. Remember, the right materials are the building blocks of your cosplay, so take your time and choose wisely. You’re one step closer to bringing your character to life!
Step-by-Step Guide to Creating Your Cosplay
With your blueprint design and materials all set, it’s time to dive into the exciting part—actually creating your cosplay! This step-by-step guide will walk you through the process, using your blueprint as a trusty guide. Let’s get started!
Step 1: Cutting Materials
Begin by laying out your materials and tools. Carefully follow your blueprint to cut each piece to the right size and shape. Remember all that effort you put into translating your image to real-life dimensions? Now’s the time it really pays off! Use your measuring tape to double-check everything before making any cuts. For foam or thermoplastic parts, a sharp utility knife works best. For fabric, fabric scissors are your go-to tool. Take your time and be precise—this is your costume’s foundation!
Step 2: Assembling Parts
Once you have all your pieces cut out, it’s time to start assembling them. Follow the sequence laid out in your blueprint. If you’re working with fabric, pin the pieces together and sew them carefully. For armor or prop pieces, use contact cement or hot glue to join parts securely. Make sure everything lines up as planned in your blueprint design. This is where your work really starts to take shape!
Step 3: Adding Details
Details are what make your cosplay stand out. Look back at your blueprint and reference image to add those special touches. This could be anything from stitching patterns on fabric to painting designs on armor. Use brushes or even sponges for painting, and consider adding weathering effects for a more realistic look. Be creative and don’t rush—details require patience but make a huge difference!
Step 4: Fitting and Adjustments
Once everything is assembled, try on your costume. Check for comfort and fit. It’s important to make any necessary adjustments now. You might need to take in some seams, add extra fastenings, or trim parts of armor. Your blueprint design help will come in handy here, guiding you to ensure everything fits just right.
Step 5: Final Touches
Lastly, add any accessories or props that complete your cosplay. These might include belts, hats, or jewelry. Make sure these extras align with your blueprint and enhance the overall look. Step back and admire your work—you’ve brought your character to life!
Remember, every step you take is a part of your creative journey. If things don’t go perfectly, don’t worry! Every mistake is a chance to learn and improve. Enjoy the process and have fun—your cosplay is a reflection of your passion and creativity. You’re almost there, and we can’t wait to see what you’ll create!
How to Overcome Common Cosplay Challenges
As you work on your cosplay, you might run into some challenges. Don’t worry—every crafter faces bumps along the road. Let’s talk about some common problems and how to solve them. Remember, with a little patience and creativity, you can overcome anything!
Fitting Issues
One of the most common cosplay challenges is getting the fit just right. Sometimes, even with a perfect blueprint, things don’t fit as expected. If your costume is too tight or too loose, don’t panic! Start by checking the seams—sometimes adjusting these can make a big difference. If it’s too tight, consider adding extra fabric or panels in hidden areas. If it’s too loose, you can take in seams or add darts for a snug fit. Always try on your costume as you go, and don’t be afraid to make adjustments.
Material Mishaps
Working with different materials can be tricky. Maybe your paint didn’t dry as expected, or your foam isn’t sticking together. For paint issues, make sure you’re using the right kind for your material. Test on a small piece first to see how it behaves. If foam pieces aren’t sticking well, try using a stronger adhesive like contact cement. Remember, every material has its quirks, so always test and experiment before making final decisions.
Time Management
Time can slip away quickly when you’re deep into a cosplay project. If you’re feeling overwhelmed, break your project into smaller tasks. Focus on one part of the costume at a time, like the armor or the cape. Set mini-deadlines for each task to keep yourself on track. Prioritize what’s most important, and don’t be afraid to ask for help—reaching out to the community can provide new ideas and support.
Staying Organized
With so many pieces and tools, staying organized can be a challenge. Use labeled bins or boxes to keep different parts and materials separate. Keep your workspace tidy to avoid losing important items. A checklist can also help you track your progress and remember what needs to be done next. Organization can save you time and stress, allowing you to focus more on crafting.
Creative Blocks
Sometimes, you might feel stuck and unsure of how to move forward. This is normal! Take a break and step away for a bit. Look at other cosplays online or visit crafting forums for inspiration. Talking with other crafters can spark new ideas. Remember, creativity isn’t a straight line—it’s okay to pause and gather new inspiration.
Challenges are a natural part of the cosplay journey. They help you learn and grow as a crafter. Embrace them with a problem-solving mindset, and don’t be afraid to make mistakes. Each problem you solve is a step closer to an amazing cosplay. You’ve got this, and we’re cheering you on every step of the way!
We hope this guide on blueprint design help for cosplay inspires you to create your next masterpiece. Share your creations with the Crafting Inspirations community, and check out more articles on our site for continued inspiration and guidance!